How to make a knot pillow
I was super excited when I made this knot pillow and it actually worked really well. I began copying a tutorial by HGTV then decided to change the knot a bit to make it how I wanted. I made my knot cushion in a way that meant I had no loose ends, spare ends or loose safety pins and two good sides.
Things you will need are:
- Two pairs of tights (any size)
- Thread (the same colour as your tights)
- Needle
- Safety pins
- Stuffing (you need a fair amount for this)
Step 1:
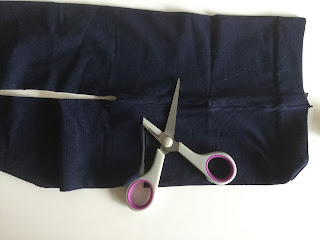
Cut the legs off both pairs of tights
Step 2:
Stuff them loosely to the brim
Step 3:
Safety pin the open end of each tight leg together
Step 4:
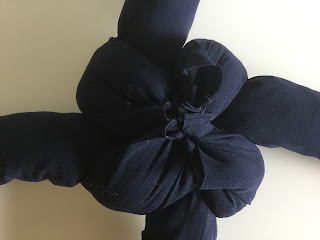
Spread the tights out so that it looks like a plus sign and complete the beginnings of a “good luck” knot (I have included the photos of how to do it here) Make sure you tighten the knot once you are done.
Step 5:
Turn the knot to the back where the pins are holding it together and sew the ends together. This doesn’t have to be very neat because you won’t see it in the end anyway. Once you have finished sewing, remove the pins.
Step 6:
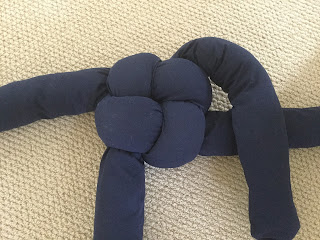
Turn the pillow back onto the right side and complete the knot again, this time going clockwise. (Refer to photos below) Once again, tighten your knot so that you cannot see the previous knot.
Step 7:
Now turn your pillow to the back again which would not have changed throughout the knotting process. Complete the knot on this side too.(refer to photos below)
The end of your tights should just be poking out the sides of this knot. If they aren’t, then loosen and tighten the previous knots until it is the right length.
Step 8:
Neatly sew the end of each tight leg to the material surrounding it so that the knot is secure
Step 9:
Now you have finished making your knot pillow, find a nice spot for it to sit and admire your beautiful work!
I hope that this tutorial was easy enough to understand. If you have any questions regarding the instructions or the post in general, please feel free to leave a comment beneath this post. Thanks for visiting my blog, come back next week for another post!
~Inkpot Blogger


Comments
Post a Comment